Our catalog is under construction with new products being added daily! Please call with any questions (231) 582-9971.
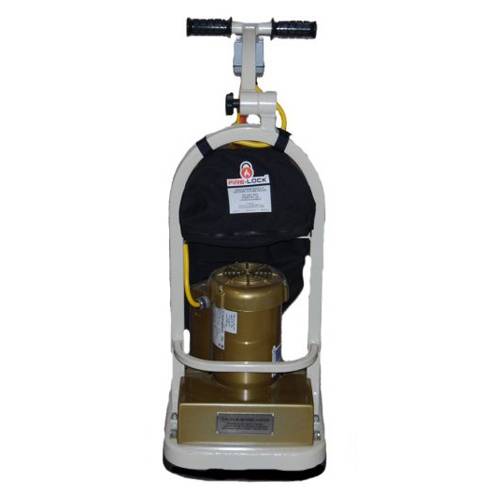
Orbital U-Sander 4-6" Disc (CherryHill)
Cherry Hill Orbital Sander uses four 6" Sanding Discs
Here’s a step-by-step guide to operating the CherryHill US 146 U Sander:
Here’s a step-by-step guide to operating the CherryHill US 146 U Sander:
Safety First
- Personal Protective Equipment (PPE): Always wear safety goggles, ear protection, gloves, and a dust mask.
- Check Surroundings: Ensure the area is clear of people, pets, and obstacles. Be aware of any potential hazards.
Starting the Machine
- Inspect the Machine: Check for any visible damage or wear. Ensure all parts are secure.
- Power Supply: Make sure the machine is plugged into a properly grounded outlet. Use an appropriate extension cord if needed.
- Controls: Familiarize yourself with the controls. The CherryHill US 146 U Sander has a control panel with various switches and levers.
-
Start the Engine: Follow the start-up procedure:
- Turn the power switch to the "ON" position.
- Adjust the handle to a comfortable position using the handle adjustment lever.
Operating the Sander
- Position the Machine: Move the machine to the area you want to sand. Use the handle to maneuver it into place.
- Engage the Sanding Pads: Lower the sanding pads to the floor using the lever.
-
Sanding Process:
- Start at one end of the room and work your way to the other.
- Move the sander in a straight line, overlapping each pass slightly to ensure even sanding.
- Keep the sander moving at a steady pace to avoid gouging the floor.
- If you need to stop, raise the sanding pads before turning off the machine.
Shutting Down
- Disengage the Sanding Pads: Raise the sanding pads using the lever.
- Turn Off the Machine: Move the power switch to the "OFF" position.
- Clean Up: Clear away any dust and debris. Inspect the machine for any damage or wear.
Maintenance
- Daily Checks: Inspect the machine before and after each use. Check for loose or damaged parts.
- Cleaning: Clean the sanding pads and dust collection system regularly.
- Storage: Store the machine in a dry, secure location. Properly coil and store the power cord.
For more detailed instructions, you can refer to the operator's manual.
Stay safe and happy sanding! If you have any other questions or need further assistance, feel free to ask.


